Part 0 - Setting Up
Prior knowledge Link to heading
This tutorial assumes some basic familiarity with programming in general, and with Python. If you’ve never used Python before, this tutorial could be a little confusing. There are many free resources online about learning programming and Python (too many to list here), and I’d recommend learning about objects and functions in Python at the very least before attempting to read this tutorial.
… Of course, there are those who have ignored this advice and done well with this tutorial anyway, so feel free to ignore that last paragraph if you’re feeling bold!
Installation Link to heading
To do this tutorial, you’ll need Python version 3.5 or higher. The latest version of Python is recommended (currently 3.7 as of March 2019). Note: Python 2 is not compatible.
You’ll also want the latest version of the TCOD library, which is what this tutorial is based on.
Installation instructions for TCOD can be found here.
While you can certainly install TCOD and complete this tutorial without it, I’d highly recommend using a virtual environment. Documentation on how to do that can be found here.
Editors Link to heading
Any text editor can work for writing Python. You could even use Notepad if you really wanted to. Personally, I’m a fan of Pycharm and Visual Studio Code. Whatever you choose, I strongly recommend something that can help catch Python syntax errors at the very least. I’ve been working with Python for over five years, and I still make these types of mistakes all the time!
Making sure Python works Link to heading
To verify that your installation of both Python 3 and TCOD are working,
create a new file (in whatever directory you plan on using for the
tutorial) called engine.py, and enter the following text into it:
import tcod as libtcod


def main():
    print('Hello World!')


if __name__ == '__main__':
    main()
Run the file in your terminal (or alternatively in your editor, if possible):
python engine.py
If you’re not using virtualenv, the command will probably look like
this:
python3 engine.py
You should see “Hello World!” printed out to the terminal. If you receive an error, there is probably an issue with either your Python or TCOD installation.
Downloading the Image File Link to heading
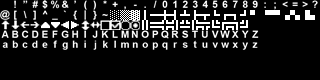
For this tutorial, we’ll need an image file. The default one is provided below.

Right click the image and save it to the same directory that you’re planning on placing your code in. If the above image is not displaying for some reason, it is also available for download here.
About this site Link to heading
Code snippets in this website are presented in a way that tries to convey exactly what the user should be adding to a file at what time. When a user is expected to create a file from scratch and enter code into it, it will be represented with standard Python code highlighting, like so:
class Fighter:
    def __init__(self, hp, defense, power):
        self.max_hp = hp
        self.hp = hp
        self.defense = defense
self.power = power*Taken from part 6.
Most of the time, you’ll be editing a file and code that already exists. In such cases, the code will be displayed like this:
class Entity:
-   def __init__(self, x, y, char, color, name, blocks=False):
+   def __init__(self, x, y, char, color, name, blocks=False, fighter=None, ai=None):
       self.x = x
       self.y = y
       self.char = char
       self.color = color
       self.name = name
       self.blocks = blocks
+       self.fighter = fighter
+       self.ai = ai
+
+       if self.fighter:
+           self.fighter.owner = self
+
+       if self.ai:
+           self.ai.owner = self
class Entity:
    def __init__(self, x, y, char, color, name, blocks=False):
    def __init__(self, x, y, char, color, name, blocks=False, fighter=None, ai=None):
        self.x = x
        self.y = y
        self.char = char
        self.color = color
        self.name = name
        self.blocks = blocks
        self.fighter = fighter
        self.ai = ai

        if self.fighter:
            self.fighter.owner = self

        if self.ai:
            self.ai.owner = self
*Also taken from part 6.
Clicking a button above the code section changes the “style” for not just that code block, but the entire website. You can switch between these styles at any time.
In the case of the example above, you would remove the old __init__ definition, replacing
it with the new one. Then, you’d add the necessary lines at the bottom. Both styles convey
the same idea.
But what’s the difference? The “Diff” style shows the code as you might find it when doing a Git diff comparison (hence the name). It shows plusses and minuses on the side to denote whether you should be adding or subtracting a line from a file. The “Original” style shows the same thing, but it crosses out the lines to remove and does not have plusses nor minuses.
The benefit of the “Diff” style is that it doesn’t rely on color to denote what to add, making it more accessible all around. The drawback is that it’s impossible to accurately display the proper indentation in some instances. The plusses and minuses take up one space, so in a code section like this one, be sure not to leave the space for the plus in your code (there should be no spaces before “from”):
import tcod as libtcod

+from input_handlers import handle_keys
import tcod as libtcod

from input_handlers import handle_keys
The “Original” style omits the + and - symbols and doesn’t have the indentation issue, making it a bit easier to copy and paste code sections.
Which style you use is a matter of personal preference. The actual code of the tutorial remains the same.
Getting help Link to heading
Be sure to check out the Roguelike Development Subreddit for help. There’s a link there to the Discord channel as well.
Ready to go? Link to heading
Once you’re set up and ready to go, you can proceed to Part 1.